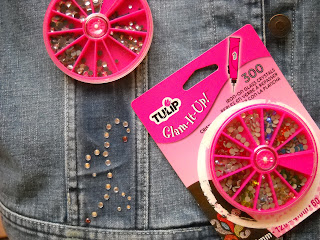
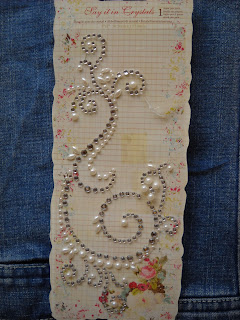
I broke my word on not buying anything to put on this jacket. I purchased some "Glam It Up" rhinestones to do the scroll work on the front. I wish I hadn't! I didn't pay attention to the price. I had looked at several items and I thought these were about $ 4.99. When I got home and looked at my receipt they were $13.99! (To justify somewhat there are 300 and I did have a coupon.) They are time consuming to place, but then you iron for 20 seconds and they are set. They come in several different colors.
I had also purchased 2 sizes of flat back pearls in the scrapbooking department. I decided to go ahead and try it on the fabric with Bling 'n Beauty Glue. Wearable art glue. In hind sight I wish I had tried using this glue on the Say It In Crystals- but another time -another project!
Polka dots were added to the collar with Scribble fabric paint in iridescent white mist. After seeing how well they turned out, I wish I had stuck to my original idea and used the paint to make the dots for the scroll work. Learn from your mistakes! The simple approach most often is the best one!
Next step- to put my ruffle attachment on my sewing machine. I got the ruffler about 6 months ago and have only used it once- but what a time saver! It will gather or pleat depending on the setting you use. I tore white strips of fabric. Tearing gives a soft, shabby look. Only down side, there are A LOT of loose threads that need to be pulled and pulled and pulled some more!
I pleated the the white strips and hand stitched them to the pocket and pocket flap. I machine stiched the ruffles onto the bottom of my sleeves.
Sorry this one is side ways- my husband didn't realize :-)
Keep those old jeans, they come in handy for all kinds of projects!
I tore a strip out of the pant leg and pleated this. When using the ruffler you need to double the amount of finished fabric you need.
The denim ruffle was machine stitched at the edge of the buttons. I used the left over denim blue rit dye and the toothbrush and brushed it over the piece. Since this had come from a pair of pants, the color was a lot lighter, so the dye helped blend the piece into the jacket. Once the jacket was dry, I embellished the pockets.
Once again items from the scrapbooking department, a lovely rhinestone and wire flower was glued to the pocket with the Bling "n Beauty glue. I used one the small skeleton keys, it peeks out from under the pocket flap. I sewed an iridescent pearl button into the buttonhole.
My husband thought the sleeves needed more. So I machine sewed white, pregathered lace over the white ruffles. He was right- much prettier!
For the finishing touches I added hand turned roses, made from the same torn white fabric. There are lots and lots of tutorials on the internet for these and very easy to make!
The roses were glued to the buttons on the bottom back. With the Bling 'n Beauty glue.
I added some of the flat back pearls to one of the keys on the back of the jacket using the art glue again.
The back!
All finished!!
Knowing when to say, enough is enough is the hard part!
My faithful helper, our calico kitty Gemma. She LOVES ribbon, tulle and fabric.
Just like me! :-)


